Chocolate Shells

Monday, May 30, 2011


 I love chocolate shells filled with just about anything. In fact, where I work sells really small ones made for cream liquors that people buy up around the holidays. 


A few months ago my Gram gave me these two Wilton silicone flower cupcake molds. I put them in my pantry and thought that I'd make some flower cupcakes when summer was here. Well, I came across them while cleaning and thought... chocolate shells! Duh!


It's easy. In a glass bowl or double boiler, melt some chocolate. I used dark chocolate ;)


Scoop some melted chocolate into each mold. I guessed the amount and added some more to cups that didn't seem full enough.

I held the mold and tilted the chocolate around and around and around and around.... you get the point. I did it until the chocolate barely moved anymore. I put the mold in the fridge to set.


Then ta da! They popped out of the silicone mold very easily. A little cracking at the tops of the shells but you can cover that with your filler...
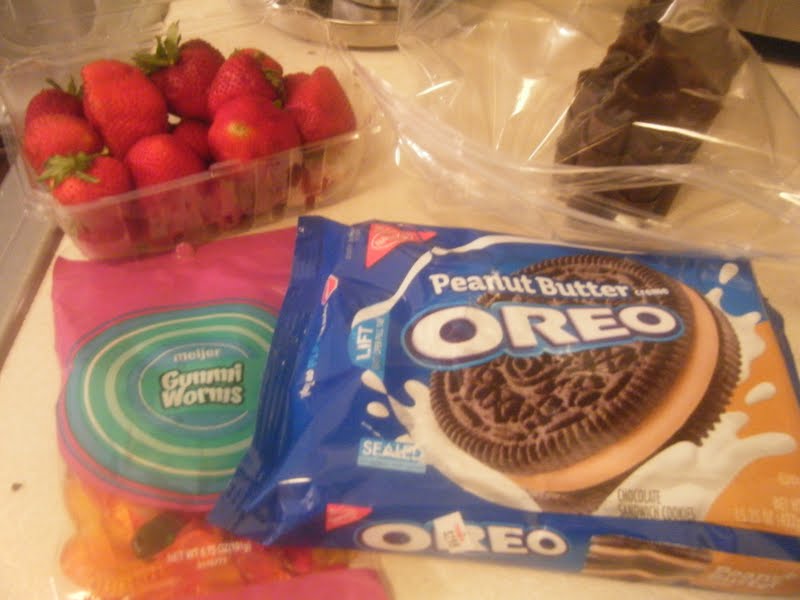


I made two types... a mud cup and chocolate with strawberries.

Both used a fudge chocolate pudding from a box.


For mud cups you use crushed Oreo ( I found peanut butter Oreos... aside from being delicious they looked more like dirt!) and a gummie worm.


And for the second kind I just topped the pudding with slices of strawberries.

YUM!

I kept them refrigerated but before you serve them you should take them out to come a little to room temp. It makes eating the chocolate shell easier.

Chicken Enchiladas

Thursday, May 19, 2011

I am a huge fan of mexican food. A standard quick meal around my house includes nachos, quesadillas and soft tacos. One thing I had never attempted, though, was enchiladas. Check these out because they were delicious and completely customizable. 


INGREDIENTS

2 boneless skinless chicken breasts, thawed if frozen
1 Tbsp olive oil
1/2 onion chopped
1 green bell pepper sliced
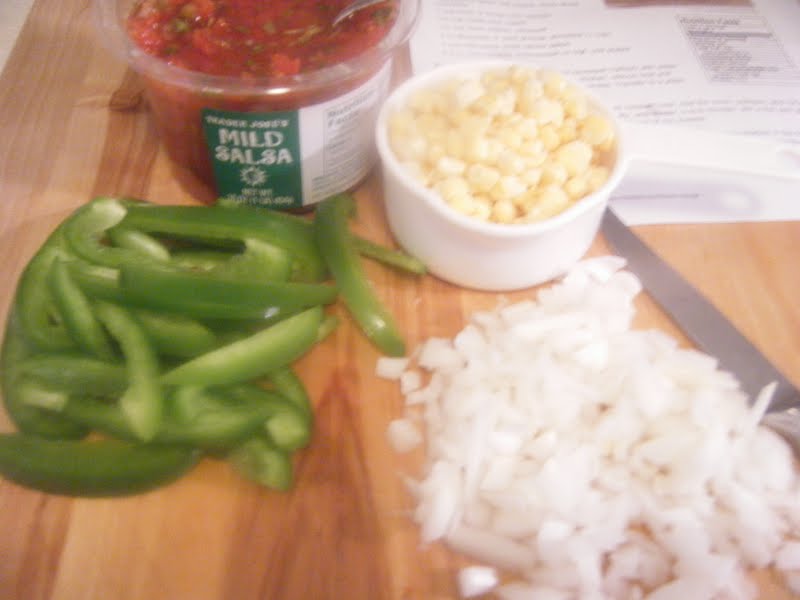
1 cup corn kernels
1/4 cup sour cream
2 Tbsp dried cilantro
1 cup monterey jack shredded cheese
Mild salsa
8 corn tortillas (I could only fit 7!)


1. In a large pot, boil water and add in the chicken. Cook 12 minutes or until cooked through. Preheat oven to 450F.


2. Remove from water and shred with forks.


3. Meanwhile, saute the olive oil, onion and peppers until tender.


4. Add in the corn and warm through.


5. Fold in the chicken, 1/2 cup of the cheese and the sour cream. Remove from heat once it is warmed through. Do not over stir.


6. Microwave the corn tortillas for 10-20 seconds until soft and pliable. In a large baking dish, spread about a 1/2 cup of salsa on the bottom of the dish to prevent sticking.

7. Fill tortillas and roll. Place seam side down in the baking dish.

8. Top the filled tortillas with salsa and the rest of the cheese.


9. Bake for 10 minutes until the cheese is melted and the edges of the enchiladas start to brown.


These were amazing and the best part is once you get the basic recipe down you can fill these with anything. I'm thinking steak is next. And another suggestion I found online for enchiladas was to use a salsa verde which sounds amazing. Yum!

Mother's Day

Sunday, May 8, 2011

I didn't bake my mom anything for mother's day. Instead, we created something that we can enjoy and savor all summer long. A mother-daughter vegetable garden!


We hit up the hardware store's garden center and picked up a bunch of plants that were already started. Easy peasy.


When I got there today my mom had already started taking up the grass. We finished that and I leveled out the area as best I could. I'm new to this!!!


We planted roma tomatoes, zucchini, leeks, red bell peppers, yellow banana peppers, jalapenos, cherry tomatoes and heirloom tomatoes, beans, cucumbers and lettuce. Holy garden! And I know she had pots she was going to put some herbs in too!


This is my dog Dexter. He helped dig up all the sticks and roots so we could plant our veggies. What a good helper!


A little water... 


Job well done team!! 


I can't wait for this to grow into delicious veggies! I'm already looking up new recipes to try, my mouth is watering at the thought of some homemade salsa again and I'm so happy my mom finally got her courtyard garden! Happy mother's day!

The Big 5-0!

Sunday, May 1, 2011

 Some people mourn turning 50... others celebrate it. And when you celebrate anything what do you need... sweets!!!! Check out these 50th birthday cookies I made for my stepmom and a family friend. They went to a casino for the night and one of the ladies going wanted to surprise them with some birthday treats!


I made two cookies: a birthday cake and a square. I went with my favorite sprinkles (they just scream party right?!)


 I love these. The "50" is black royal icing covered in navy blue edible glitter. It kind of made it look like it exploded. I liked the effect.


I ended up bagging each individual cookie in a clear bag with red ribbon tied at the top. Too cute right!?

Happy 50th Eileen!

Last Bit of Easter

Friday, April 29, 2011

I'm up early, watching the royal wedding. I admit it. I've been watching the specials for weeks now. I find it fascinating. The tradition, opulence, the freaking tiara! What can I say. I'm a little jealous.

But, as I was watching this, I started to tidy the desk and found my camera, with Easter pics still on it. Oops. Sorry!

So, I made my Easter Bunny like usual. Too cute!

And some sugar cookie eggs!


There are my chocolate covered peeps from last post. And of course, my stepmom's birthday was two days earlier so I made some birthday cupcake cookies!


Sup Bunny?!

And my little brother got the honor of beheading the Bunny Cake!


Hope you all had a great Easter!

Back to the wedding!

Easter Treats!

Saturday, April 23, 2011

The night before Easter I am covered in powdered sugar and food dye. I have crisco smeared across the counter and enough dishes to terrify the most efficient dish washer. It has been a good night. 

Now, not everything is done for tomorrow but I wanted to show you some things I made last year, since I wasn't a blogger yet. 

A few years ago, my mom got me a great cake pan from Williams and Sonoma. Check it out below. And yes, those are fruity pebbles in the pan... 


CUPCAKE PEBBLES!!!! 

I found these at Meijer last year but I couldn't find them this year. Bummer. They were delicious. Like a sugar buzz in a bowl!


I made, essentially, a giant rice krispie treat out of cupcake pebbles and pressed it into the bunny pan.
Add a little frosting to put the bunny together and voila! A bunny centerpiece... that you can eat!


Aww, cute little  bunny!


I can be a little crafty too! Me, plastic easter eggs and a hot glue gun. It got messy. And someone, I won't name who, got a burn or three but... cute door wreath right!?


But my favorite of all time... the bunny cake. Using the same pan as above, I made a red velvet bunny, coconut grass and decorated it all with vanilla frosting and easter candy!


Unfortunately, it was not a good year for the bunny! Off with his head!!!!


Another bunny... from another year...


And yes, the red velvet cake is on purpose. It's funny. :)

So, the bunny will be making another appearance this year. It'll be his first time at my dad's house. He was on hiatus last year. I have a few other treats under my belt this year so stay tuned!

And happy Easter!

Peeps!

Wednesday, April 20, 2011

I LOVE peeps! I love all the different peeps for all the different holidays... I love them soft or stale, in a s'more or in my hot cocoa. What I didn't know, is that I could also love peeps covered in chocolate! WHAT?! Chocolate covered peeps?! I think I might faint.

So, looking for cute and easy Easter dessert ideas I happened to google search "peeps" in images and came across chocolate covered peeps! Well of course I'm trying it. Period. I went to the store and bought some bunny peeps. Oh, it's on.


INGREDIENTS (simple)

Peeps
Melting chocolate
Sucker sticks

1. First I shoved a stick up the peep. Rude I know, but necessary.

2. Lay them out on a tray and freeze them so coating them in chocolate isn't too difficult. It keeps the peep stiff and not floppy. Trust me. My first peep was a bit floppy.


3. Take a few peeps on a stick out at a time and coat in chocolate.


-Oh no! I'm being devoured by rich dark chocolate!- 


 4. Let set on a tray with parchment paper or put in the fridge to harden the chocolate quickly.


So, I'm not sure if I'm done with these. I saw some with cute little faces but I really like them this simple. I'll think about it.

As for the rest of my night, I will be baking some very special cookies!

More to come later! It's been a busy last two weeks for me!

Any Excuse to Eat! Copyright © 2009 Designed by Ipietoon Blogger Template for Bie Blogger Template Vector by DaPino