Portobello Pizza

Thursday, October 27, 2011

I love mushrooms and one of my favorite sandwiches from a local restaurant is a Portobello BLT. Yum. I was looking through some old magazine clippings and found a recipe that inspired this yummy meal! 


INGREDIENTS (for 2 people)

4 Portobello mushroom caps
1/2 cup pizza or spaghetti sauce
1/2 cup shredded mozzarella
Oregano

Garlic Bread

1 Whole wheat hamburger bun
Olive oil
Garlic salt

1. Turn on the broiler. 

2. Snap the stems off the caps and put belly side up on a sheet pan. 


3. Add the sauce, cheese and a sprinkle of oregano (or a pizza/spaghetti seasoning mix).


4. For the garlic bread, use a pastry brush and brush a light coating of olive oil on the inside of the buns. Sprinkle with garlic salt and put on the pan with the mushrooms.


5. Put the pan under the broiler. I took the bread out after about 4 minutes and the pizza came out at 8 minutes. It will be different in each oven depending on how close to your broiler you put your pan.

So I really loved this dinner. And according to my calculations it is around 400 calories depending on your ingredients and how much cheese you really want to use. My BF, however, wasn't a fan but said if I cut it into strips and told him it was an appetizer he thinks he would like it more lol. He's a meat lover. Whenever I make a pasta dish with veggies he asks me where the protein is... and he never accepts the answer "it's in the beans". Beans don't count with him.

Anyway, these were simple, fast and delish. I have already looked up some more simple dishes to make using mushroom caps. Enjoy!!!

Jalapeño Cheddar Wrap

Sunday, October 23, 2011

One of my BF's and my favorite restaurants has this great wrap with queso and chicken. We love it, but isn't it more fun to stay home and make a meal together??? Of course! So here is our version...

INGREDIENTS

1 diced jalapeño
1/4 cup diced onion
2 diced roma tomatoes
Chopped lettuce
Shredded cheese or queso (we've done both and queso is definitely zestier!)
2 thawed chicken breasts sliced 
1 tablespoon taco seasoning
2 -  12 inch tortillas (we used a great Jalapeño Cheddar wrap)
Sour cream or guacamole if desired

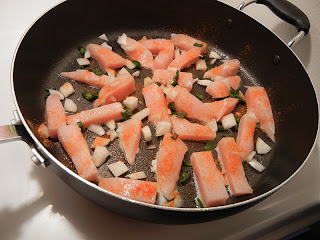
1. Chop all the ingredients while heating a frying pan with some non-stick spray. 


2. Saute the chicken, taco seasoning, jalapeño and onion until the chicken is cooked through.


Here are those snazzy wraps I listed above. This is what started the whole dinner!


3. Once the chicken is done, layer in all your fixins!


Wrap it up and eat it! Oh yeah!


It was delish! Better than the restaurant version even!


We've eaten this twice now and the BF says it's the best thing I make! He sure likes his mexican food!

Fondant 101

Friday, October 14, 2011

Last week I finally got to take a class at my local cake supplies store. I've worked with fondant with zero knowledge on how to properly handle it. I typically made cut outs and let them "dry" which wasn't really stiff. Anyway, I'd attended some tastings and informational classes before and they kept saying "no, fondant doesn't taste awful if you know how to use it." Oh really? Fine, I signed up for the class... and made this:


We covered a cake (foam of course), made a bow and practiced cut outs.


It wasn't super easy but definitely easier than I thought it was going to be.


She even had these cool texture mats you rolled the fondant out onto so there was a patter on our bows.


We also learned what to use to flavor the fondant and how thin to roll it so it stays soft and almost melts into the buttercream frosting underneath. We tasted an almond fondant on a piece of pound cake and it was great: still soft, melted into the frosting underneath, delish!

I can't wait to try this on my own. I think I'll start small with a two layer, 6" cake. Or maybe even just the decorated discs on top of some cupcakes. Stay tuned!

Homemade Vanilla Extract

Tuesday, October 4, 2011

So I was thinking about something cute to make to give as gifts this holiday season. I know it's early but I'm really excited!!!

So I found a few cute ideas and this was one of them... Homemade Vanilla Extract! Who doesn't use vanilla extract?


First I ordered some vanilla beans from Vanilla Saffron Imports and some glass bottles from Specialty Bottle Supply. I'm no expert on either of these things but I think I got a deal. I ordered 1/2 pound of Tahitian Vanilla Beans for around $15 and 8 ounce glass bottles with screw on cap for $1.08 each.

Oh, and don't forget the vodka.


INGREDIENTS

a fifth of vodka
15 vanilla beans
5 - 8 ounce jars with lids
3 months time

Doing some research online it seemed the consensus was that it should be three vanilla beans to each 8 ounces of vodka. So start by putting three vanilla beans into each jar. Then, carefully top off with vodka.


Screw the caps on tightly and enjoy how simple that was.


Now the time consuming part. Put the bottles in a cool dark place like a closet. You will need to shake the bottles every week for three months or so.

This is how my bottle looks after three weeks.


After three months they will be ready to go. I also read somewhere that you can top off the bottle with more vodka and continue to use the beans to make more vanilla extract. I'm sure how long they will last for but I sure like reusing.

Anyway, the 1/2 pound of vanilla beans I used was more than I needed so stay posted for another holiday gift from the kitchen I will be making here shortly. I got the jars for the next project at the same website too! Man do I feel crafty!

Any Excuse to Eat! Copyright © 2009 Designed by Ipietoon Blogger Template for Bie Blogger Template Vector by DaPino