Freezing

Wednesday, August 25, 2010


Check out these awesome green beans and blueberries! I definitely can't eat all this before it starts to go bad so... my mom brought by a freezing book from back in the day. ( I felt like I should be wearing a dress, heels and apron when I read it!!) 

For the green beans I par cooked them for about three minutes in boiling water then drained them and put them in a bowl of ice water. 


Drain on a kitchen towel then spread out on a baking sheet and put in the freezer. Once frozen, or close to, bag and put back in the freezer. Freezing them on a baking sheet makes it so much easier to grab the amount you need for the dish you're making and go. 


For the blueberries, and bananas I forgot to take pics of, I spread them out on a baking sheet and froze them the same way as the beans. For the bananas I sliced them into three pieces and plan to use them with some peanut butter and milk for some awesome breakfast smoothies!!

I love that I'm learning to can and freeze and save fresh food that I got straight from the farmer who grew them. It feels good to know you're food, even if frozen, is fresh and in some ways, made by you. 

PS. That sauce from the last post was an awesome star in last night's dinner! Post soon to come!!


Tomato Sauce

Monday, August 23, 2010


So after my last post, I had a few pounds of roma tomatoes left. More salsa? No. I tried something different. Tomato sauce!

It was kinda fun too!

First I flash boiled the tomatoes for about three minutes. Some of the smaller tomatoes' skins broke but that's ok. It makes one of the next steps easier.


Take them out and put them in a bowl of cold water and ice.


I did these in batches so after I put the boiled tomatoes in the cold water I immersed the next batch in the boiling water.

While the second batch boils, split the skin of the "cold water" tomatoes...


and then squish out the insides!!!!! That was fun!!!


Discard the skin and put the rest in a strainer over an empty bowl. Drain as much liquid as possible.  I had to empty the bowl four times.


I got a full colander full of tomatoes. Then I pureed the heck out of them in a food processor!

The next part is kind of boring. I didn't want to make a full on pasta sauce because my BF and I have very different tastes. I like heavy garlic, some spinach, mushrooms, onions or bell peppers... or any combo of these. He likes... meat. So a neutral sauce it is. To be dressed up at a later time!

I heated mine up, mostly for tasting purposes, and added some parsley, garlic, salt, pepper, etc. Whatever was in the spice rack and tasted good.


Then I thought... can? Or.... FREEZE!


I saw this somewhere while looking for some ideas (don't ask me where I can't remember for the life of me!) and thought, for two people, who microwave frozen ravioli in a tupperware for lunch a few times a week, this is perfect!!

I froze and bagged the cubes and LOVE it! I made four trays worth plus a little tub I wanted to try too.


A man at our local farmer's market sells his this way... actually, that's his container with the label cleaned off!

Either way, I love it. It tastes so much fresher than jarred, we can spruce it up and three cubes is more than enough for my tupperware tortellini lunch!

Another bonus, we don't have his and her's pasta sauce jars sitting half full in the fridge for two months collecting... who knows.

I'm thinking a three pepper pasta sauce is in my near future! Mmmmm over penne and shrimp... oh my!

Farmer's Market Salsa-Canned

Thursday, August 19, 2010


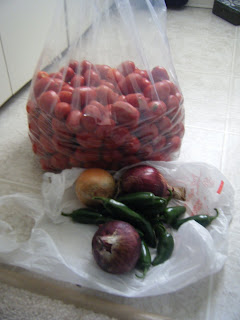
I took my mom to the farmer's market and came home with quite a haul. The above was just some of what we bought, but the above made some awesome salsa!!!

So, I've never canned before but I wanted to share what I did for other canning novices. The ingredients are an approximation and make a medium heat salsa (mom said my first tasting was too hot so I had to tone it down. Boo!)

INGREDIENTS

2/3 of a half bushel of roma tomatoes (I couldn't fit it all in my pot!)
1 yellow onion
2 red onions
6 jalapenos
6 heaping spoonfuls of diced garlic
2 large handfuls of oregeno
6 ounces lime juice

1. First I cut off the stem end of the tomato, roughly chopped and pureed in a food processor. Since I was using roma tomatoes I did not seed them... nor did I skin them. I took the easy route.

2. Quarter the onions and run through a food processor until diced.

3. I used 6 jalapenos, WITH SEEDS. This made a very spicy salsa. If you don't like the burn, seed them first but use gloves (like latex or vinyl food gloves).  My aunt gave me this tip and man was I glad. I read online that the oils from the jalapeno can burn your skin for days. Ouch!

4. Put all the ingredients in a large pot and heat to a med/lo simmer.


Here comes the canning part.

5. I sanitized my jars in the dishwasher and the lids in boiling water. Put on a large pot of boiling water.

6. Once sanitized, quickly fill the jars with hot salsa. Do not touch the rim and leave an inch or so of space at the top. Wipe any drippy salsa off the rim. Put on the lid, twist until just tightened and put immediately in a pot of boiling water that covers the jars completely.

7. Put the lid on and boil the jars about 20 minutes.

8. Take out when time is up and let cool on the counter. You'll hear a pop sound when the lids "suction" down. It's a good thing! If a jar doesn't "pop" open and eat lol


Out of this batch I got 12-1/2 pint jars (my sharing jars to give away! Also the perfect size for just two people to share) and 5 large quart jars (very big and holds almost 4 cups of salsa).

Of course I opened one and ate it that very night!!


This salsa was nice and thick, spicy and chunky. LOVE it. And it wasn't nearly as hard as I thought. I did buy the Ball Utensil Kit and used the funnel to fill the jars, the "can grabber" to take the bottle out of the boiling water and the nifty magnet on a stick to get the lids out of the boiling water too!

There are tons of salsa recipes out there. This is similar to what I make fresh and serve from my mom's garden during the summer. I can't wait to open a jar in the middle of the winter and have the summer freshness wash over me!!

Enjoy!! And happy canning!

Peanut Butter Banana Breads

Monday, August 16, 2010


It's kind of funny. I love breakfast. If I don't eat it, I'm cranky, my day is off and I munch on snack foods all day long. My BF, wouldn't eat breakfast if I didn't make him. Now, he does know when he eats breakfast he feels better all day but it's like pulling teeth.

One of my favorite things in the whole world is a good bread with some butter spread on it. I stare at those farmer's market tables with the glazed cranberry bread, pumpkin breads and zucchini loaves. I try not to drool but... sometimes...

At the moment I'm in the mood to cook, bake, freeze and can all my favorite things before the fresh veggies are gone for the season! Since I don't know how to can, yet, I decided to start with some bread to eat for breakfast, take to work and munch on instead of chips.

Enter, Peanut Butter Banana Bread

INGREDIENTS

1/2 cup softened butter
1 cup sugar
2 eggs
1/2 cup peanut butter
2 ripe, mashed bananas
2 cups AP flour (I used half AP and half whole wheat)
1 tsp baking soda

1. Preheat the oven to 325 F. Cream together the butter and sugar.

2. Add in the eggs, peanut butter and bananas. Mix.

3. Gradually add in the flour and baking soda.

4. Pour batter into greased mini loaf pan and bake for 30 minutes or until toothpick comes out clean.


At this point I had made 14 mini loaves... I am only one person. So, I decided to leave out two for myself this week and freeze the rest.

5. Let cool completely.

6. Individually wrap or put in zip top bags and seal. Freeze.


Now you can take out a two pack and have them ready to eat for work or breakfast.

I've tried these with butter and with peanut butter... and I have to say, peanut butter as the spread wins!!! Sooo good!!! And you know what? Even if my BF were to have a breakfast revelation, I'm not sharing!!!!

Simple Garden Pasta Salad

Friday, August 13, 2010


One of my favorite things during the summer is this simple pasta salad. I've been eating it for years and it never gets old.

I stopped by my dad's a few days ago and he gave me these...


Fresh from the garden cucumbers and tomatoes! Yum! Since I live in an apartment I have to pay top dollar at the farmer's market to get anything like this!!

Looking in the fridge tonight I wanted... nothing. But something cold. But nothing in front of me. So... I made this...

INGREDIENTS

Pasta
Cucumbers (washed, sliced)
Tomatoes (washed, cored and diced)
Mayo
Italian dressing
*Optional: chopped garlic, parmesan cheese

1. Boil the pasta in salted water.

2. Meanwhile, cut/dice the cucumbers and tomatoes.


3. Drain pasta and mix in with the veggies.

4. Here's where it gets tricky... I like more mayo than dressing. You know, creamy. I start with a quick squirt of dressing and a good scoop of mayo and adjust from there. Usually with more mayo! Refrigerate!!!

* If you're in the mood, I like to stir in a small spoonful of chopped garlic (before I chill) and then a sprinkle of parmesan cheese just before I eat.

Chocolate Covered Coconut Balls

Sunday, August 8, 2010


AKA a mounds bar!! My mom makes these at Christmas time but I was craving some! Such a good snack on the table to soothe my sweet tooth!

INGREDIENTS

1 Pound powdered sugar
1 Pound shredded coconut
1 Can sweetened condensed milk
Melting chocolate (I used dark chocolate)

It's so easy you'll be making them before you're done reading!!

1. Mix coconut and condensed milk.

2. Slowly mix in the powdered sugar until dough is no longer wet and sticky.

3. Refrigerate until stiff.

4. Roll into balls and dip in melting chocolate.

5. Let set then eat!!


I make mine pretty big. You need at least two bites to eat them! I got about 4 dozen out of this batch and they were a hit!  I had to send some home in a baggie because they liked them so much!

Oreo Cupcake

Friday, August 6, 2010


Oh yea... that's what I'm talking about. 

I have wanted to make an Oreo cupcake for a while now. Remember my Oreo Chocolate Chip Cookies?! Add this one to the list of why Oreo's are amazing!

INGREDIENTS

White cake mix (eggs, oil and water)
36 Oreo Cookies

1. Prepare the white cake mix as directed. Set aside. 

2. Twist the tops off of 24 Oreos. Place the half with the creme, creme side up, in the cupcake paper. 

3. Crush the tops (without creme) and fold into the batter. 

4. Fill the cupcake papers with the batter and bake according to the box directions. 

In the mean time you can prepare the frosting. Or open a can of vanilla frosting. I used my recipe but I kind of wish I had one of those "too sweet" frostings to use with this cupcake. When I think of an Oreo I think sweet!

5. Frost and add a half of an Oreo to the top. Enjoy!!


Strawberry Cupcakes

Monday, August 2, 2010


Two dinner parties this weekend and holy cow am I stuffed!!

But aren't these cupcakes cute!? My BF said they were his fav so far!!

I will say though, I used a white cake mix from a box for the cake part. I know... but I did and it was still good. lol

Strawberry Cream Cheese Frosting (to die for!)

INGREDIENTS

2 Pounds powdered sugar
8 Oz cream cheese
1/4 cup unsalted butter
3/4 cup pureed strawberries


1. First I pureed the fresh strawberries until chunky.

2. Cream together cream cheese and butter until well combined.

3. Add in the strawberries and slowly add in the powdered sugar. Mix on a medium speed until creamy and fluffy.


Top with any fancy do dad you want! I halved strawberries and added a cute umbrella. The frosting was so fresh tasting I could have eaten all of them!!

And my guests loved them too!!

Enjoy!

Any Excuse to Eat! Copyright © 2009 Designed by Ipietoon Blogger Template for Bie Blogger Template Vector by DaPino