Hiatus

Saturday, November 19, 2011

It's been a while huh? I've been pretty busy. Work is always hectic but more so lately planning our annual celebration, packing up this place and slowly transferring to my mom's basement, signing up for grad school and trying to figure out where that will fit into my day... stress stress stress!

So, that being said, this blog is going to take a back burner to my life for a while. I plan to be back and at it by January of next year. Once all this gets rolling and I get with it, I really want to make room for a few blog posts and get inspired to cook again.

Until then, Happy Holidays!

Portobello Pizza

Thursday, October 27, 2011

I love mushrooms and one of my favorite sandwiches from a local restaurant is a Portobello BLT. Yum. I was looking through some old magazine clippings and found a recipe that inspired this yummy meal! 


INGREDIENTS (for 2 people)

4 Portobello mushroom caps
1/2 cup pizza or spaghetti sauce
1/2 cup shredded mozzarella
Oregano

Garlic Bread

1 Whole wheat hamburger bun
Olive oil
Garlic salt

1. Turn on the broiler. 

2. Snap the stems off the caps and put belly side up on a sheet pan. 


3. Add the sauce, cheese and a sprinkle of oregano (or a pizza/spaghetti seasoning mix).


4. For the garlic bread, use a pastry brush and brush a light coating of olive oil on the inside of the buns. Sprinkle with garlic salt and put on the pan with the mushrooms.


5. Put the pan under the broiler. I took the bread out after about 4 minutes and the pizza came out at 8 minutes. It will be different in each oven depending on how close to your broiler you put your pan.

So I really loved this dinner. And according to my calculations it is around 400 calories depending on your ingredients and how much cheese you really want to use. My BF, however, wasn't a fan but said if I cut it into strips and told him it was an appetizer he thinks he would like it more lol. He's a meat lover. Whenever I make a pasta dish with veggies he asks me where the protein is... and he never accepts the answer "it's in the beans". Beans don't count with him.

Anyway, these were simple, fast and delish. I have already looked up some more simple dishes to make using mushroom caps. Enjoy!!!

Jalapeño Cheddar Wrap

Sunday, October 23, 2011

One of my BF's and my favorite restaurants has this great wrap with queso and chicken. We love it, but isn't it more fun to stay home and make a meal together??? Of course! So here is our version...

INGREDIENTS

1 diced jalapeño
1/4 cup diced onion
2 diced roma tomatoes
Chopped lettuce
Shredded cheese or queso (we've done both and queso is definitely zestier!)
2 thawed chicken breasts sliced 
1 tablespoon taco seasoning
2 -  12 inch tortillas (we used a great Jalapeño Cheddar wrap)
Sour cream or guacamole if desired

1. Chop all the ingredients while heating a frying pan with some non-stick spray. 


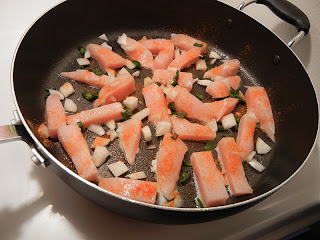
2. Saute the chicken, taco seasoning, jalapeño and onion until the chicken is cooked through.


Here are those snazzy wraps I listed above. This is what started the whole dinner!


3. Once the chicken is done, layer in all your fixins!


Wrap it up and eat it! Oh yeah!


It was delish! Better than the restaurant version even!


We've eaten this twice now and the BF says it's the best thing I make! He sure likes his mexican food!

Fondant 101

Friday, October 14, 2011

Last week I finally got to take a class at my local cake supplies store. I've worked with fondant with zero knowledge on how to properly handle it. I typically made cut outs and let them "dry" which wasn't really stiff. Anyway, I'd attended some tastings and informational classes before and they kept saying "no, fondant doesn't taste awful if you know how to use it." Oh really? Fine, I signed up for the class... and made this:


We covered a cake (foam of course), made a bow and practiced cut outs.


It wasn't super easy but definitely easier than I thought it was going to be.


She even had these cool texture mats you rolled the fondant out onto so there was a patter on our bows.


We also learned what to use to flavor the fondant and how thin to roll it so it stays soft and almost melts into the buttercream frosting underneath. We tasted an almond fondant on a piece of pound cake and it was great: still soft, melted into the frosting underneath, delish!

I can't wait to try this on my own. I think I'll start small with a two layer, 6" cake. Or maybe even just the decorated discs on top of some cupcakes. Stay tuned!

Homemade Vanilla Extract

Tuesday, October 4, 2011

So I was thinking about something cute to make to give as gifts this holiday season. I know it's early but I'm really excited!!!

So I found a few cute ideas and this was one of them... Homemade Vanilla Extract! Who doesn't use vanilla extract?


First I ordered some vanilla beans from Vanilla Saffron Imports and some glass bottles from Specialty Bottle Supply. I'm no expert on either of these things but I think I got a deal. I ordered 1/2 pound of Tahitian Vanilla Beans for around $15 and 8 ounce glass bottles with screw on cap for $1.08 each.

Oh, and don't forget the vodka.


INGREDIENTS

a fifth of vodka
15 vanilla beans
5 - 8 ounce jars with lids
3 months time

Doing some research online it seemed the consensus was that it should be three vanilla beans to each 8 ounces of vodka. So start by putting three vanilla beans into each jar. Then, carefully top off with vodka.


Screw the caps on tightly and enjoy how simple that was.


Now the time consuming part. Put the bottles in a cool dark place like a closet. You will need to shake the bottles every week for three months or so.

This is how my bottle looks after three weeks.


After three months they will be ready to go. I also read somewhere that you can top off the bottle with more vodka and continue to use the beans to make more vanilla extract. I'm sure how long they will last for but I sure like reusing.

Anyway, the 1/2 pound of vanilla beans I used was more than I needed so stay posted for another holiday gift from the kitchen I will be making here shortly. I got the jars for the next project at the same website too! Man do I feel crafty!

Dilly Beans

Thursday, September 22, 2011

First I'd like to say I am at a loss. I have misplaced so many food photos I could cry. Or, what I actually did, throw a fit and not blog for two weeks. But I digress. I must share these with you because I can't stop eating them!

So what is a dilly bean? It's a "pickled" green bean spiced with cayenne pepper. It is a great add on to a relish dish or a snack with beer. I also eat them with a sandwich in place of a pickle. 


Before you start, make sure you are using clean, sanitized jars and lids. Make sure to keep the mouth of the jar clean and try not to touch the mouth with your hands. Have a large pot of boiling water ready for the jars (that possibly holds all four quart jars.)

INGREDIENTS (makes four quarts)

(for each jar)
2 pounds trimmed green beans
1/2 teaspoon cayenne pepper
2 cloves garlic
2 heads dill

5 cups water
5 cups vinegar
1/2 cup course salt

1. In each quart jar put the beans, 1/2 teaspoon cayenne pepper, garlic cloves and heads of dill.

Please note that I went way too light on my first batch here. The beans should be packed as tightly as possible.


2. In a sauce pan, boil the water vinegar and salt.

3. Fill the jars with the liquid. Put on the lids and process in boiling water for 15 minutes.


See how these jars above shrunk up so much? And he ones below stayed packed? That is the difference. 


In two weeks you can refrigerate and enjoy your dilly beans! My fav!!

Canning!

Wednesday, September 7, 2011

I still consider myself a novice canner but man is it fun! 

We headed down to the farmer's market and picked up a bunch of goodies. We made dill pickles, dilly beans and salsa!!!


I even had a  helper to chop all my veggies!


 Here goes the onions! Oh man were those a trip! We had the fan on and the windows open!


My stash! Labeled and everything!


Can't wait for the beans and pickles to be ready! Are you canning too! I'll share my dilly bean recipe soon!

It's September!

Saturday, September 3, 2011


I know, I know! If you're living in southeast Michigan right now you may be thinking "it's 90 degrees out and it is not fall yet!" but I can't wait. I saw candy corn out at my corner store and I got all giddy. 

So, I wanted to share this cake I made a year or two ago. Fall inspired for an after-the-fact wedding reception. The leaves are fondant and were dried to look crumpled. Dusted with glitter and put on a simple white cake. 


So today, on this 90 degree day, I will sit inside and crank the air, sip some tea and dream of fall!


Holy Guacamole!

Friday, August 26, 2011


I pretty much love any kind of dip. Especially mexican inspired. I have to hit up the farmer's market this weekend to get some great tomatoes and jalapeños to can my own salsa but since I have no patience, I had to whip up some guacamole!

INGREDIENTS

2 avacados, halved, pitted and scooped
Juice of two limes
1/4 cup diced red onion
1 teaspoon diced garlic
a palm full of fresh diced cilantro


Put all ingredients in a bowl and mash together with a fork. I like mine pretty chunky.

This recipe is simple and tasted great. I also like to put a bit of salt and pepper in the guacamole and some people like to add some diced tomatoes. It's soooo goooood!


This lasted a half hour. Now I'm focused on how much veggies a single person can carry through a farmer's market without falling over. I might have to enlist my BF to help carry some tomatoes!!

Pull-Apart Cinnamon Sugar Bread

Friday, August 19, 2011


I found this recipe on a couple different sites and it seemed like such a cool looking alternative to a cinnamon roll. If this doesn't make you hungry for breakfast I don't know what will! 


INGREDIENTS

2 3/4 cups flour
1/4 cup sugar
2 1/4 teaspoons active dry yeast
1/2 teaspoon salt
2 ounces butter
1/3 cup milk
1/4 cup water
2 eggs
1 teaspoon vanilla extract

FILLING INGREDIENTS

1 cup sugar
2 teaspoons cinnamon
1/2 teaspoons nutmeg
2 ounces butter, melted

1. Whisk together flour, sugar, yeast and salt. Set aside. 

2. Whisk together the eggs and set aside. 

3. In a sauce pan, melt together the milk and butter. Remove from heat and stir in the water and vanilla extract. 

4. Pour the milk mix into the dry ingredients. Mix. Then add the eggs and stir. Mix until the dough comes together. It should be sticky. 

5. In a greased bowl, set the dough and cover with plastic wrap. Leave for about one hour. 

6. Remove the dough and let rest for half an hour. 

7. Meanwhile, whisk together the sugar, cinnamon and nutmeg in a bowl and melt your butter for the filling. 

8. Here is where it gets fun. Roll out the dough 20"x12". Or close to. 


9. Brush the dough with the melted butter then sprinkle all the sugar mix over the dough. It seems like a lot but do it anyway. Trust me.


10. Slice the dough into 6 strips 12 inches long. If you're looking at the picture above, it was six strips cut from bottom to top with a pizza cutter. Stack the slices.


11. Cut the dough into six pieces again.


12. Stack the dough squares on top of each other and place in a bread pan.


13. Bake at 350F for 25-30 minutes or until the top starts to brown.


This was a fun recipe to make and even more fun to eat. You peel the pieces apart from the end and in between each layer is lots of sugar and cinnamon stuck to the soft inside of the dough.

YUM!


Cakes!

Sunday, August 14, 2011


I love decorating cakes. And I love when people ask me to decorate cakes. I've only taken one class on cakes and a few on other desserts (cookies, chocolates and cupcakes! Oh my!) so I don't feel SUPER confident with cakes but I definitely feel better with each cake. 

This one is a wedding cake I made for a family friend. White cake (did you know you can't use yolks in the cake batter to get a cake super white?) with white frosting and purple scrolling. She topped it with flowers from the bouquets. Pretty!


This one was for a birthday at a baby shower so the colors matched the baby shower theme. Green and brown was a little odd... all I could think of was branches... but scrolling is always pretty lol. It's a safe go to.


And I threw this one in for good measure. I made it for my grandma's birthday. It's the cupcake pan decorated as a flower covered cupcake. I made the purple flowers out of royal icing a few days before. 


Too cute right?


Southwestern Chipotle Pasta

Monday, August 8, 2011

Long time no blog!! Just got back from vacation and I think I need another few days off!!


We sat by the camp fire...


Ate a few too many s'mores...


Grilled up some awesome kabobs...


Ate too much... 


 We stayed in a really cute cottage my mom rented... the pantry was the cutest thing ever...


We even brought the dogs!

Now onto the food...

We stopped in at a shop called Nobel which had some great flavored pastas, nuts and sauces. My kind of place. I took my BF back and we picked out some pasta to take home and try since he is the self proclaimed pasta master. :)


This was the haul of veggies I came back to when we stopped at my mom's to drop off some of the vaca supplies...

So we decided to make the pasta we had bought!

INGREDIENTS

2 cups halved cherry tomatoes
1/2 can black beans
1 diced jalapeño, seeds removed
diced red onions
1 cup frozen corn
2 boneless skinless chicken breasts diced
Pasta
Olive Oil
Taco seasoning


1. In a skillet, sauté the chicken and olive oil.

2. Once the chicken starts to brown, put on a pot of water and cook your pasta.

3. Add all your veggies to your chicken and finish cooking the chicken through. Add in a sprinkle of taco seasoning if desired.


4. Top your drained pasta with the chicken mix and yummy!


The pasta itself was spicy and the topping went with it wonderfully. Sort of. My BF thinks the tomatoes didn't fit but I loved them because they are a hint of sweet plus, the juices really make the sauce. We agreed to disagree and finished it all. :)


Enjoy!

Any Excuse to Eat! Copyright © 2009 Designed by Ipietoon Blogger Template for Bie Blogger Template Vector by DaPino