Last Bit of Easter

Friday, April 29, 2011

I'm up early, watching the royal wedding. I admit it. I've been watching the specials for weeks now. I find it fascinating. The tradition, opulence, the freaking tiara! What can I say. I'm a little jealous.

But, as I was watching this, I started to tidy the desk and found my camera, with Easter pics still on it. Oops. Sorry!

So, I made my Easter Bunny like usual. Too cute!

And some sugar cookie eggs!


There are my chocolate covered peeps from last post. And of course, my stepmom's birthday was two days earlier so I made some birthday cupcake cookies!


Sup Bunny?!

And my little brother got the honor of beheading the Bunny Cake!


Hope you all had a great Easter!

Back to the wedding!

Easter Treats!

Saturday, April 23, 2011

The night before Easter I am covered in powdered sugar and food dye. I have crisco smeared across the counter and enough dishes to terrify the most efficient dish washer. It has been a good night. 

Now, not everything is done for tomorrow but I wanted to show you some things I made last year, since I wasn't a blogger yet. 

A few years ago, my mom got me a great cake pan from Williams and Sonoma. Check it out below. And yes, those are fruity pebbles in the pan... 


CUPCAKE PEBBLES!!!! 

I found these at Meijer last year but I couldn't find them this year. Bummer. They were delicious. Like a sugar buzz in a bowl!


I made, essentially, a giant rice krispie treat out of cupcake pebbles and pressed it into the bunny pan.
Add a little frosting to put the bunny together and voila! A bunny centerpiece... that you can eat!


Aww, cute little  bunny!


I can be a little crafty too! Me, plastic easter eggs and a hot glue gun. It got messy. And someone, I won't name who, got a burn or three but... cute door wreath right!?


But my favorite of all time... the bunny cake. Using the same pan as above, I made a red velvet bunny, coconut grass and decorated it all with vanilla frosting and easter candy!


Unfortunately, it was not a good year for the bunny! Off with his head!!!!


Another bunny... from another year...


And yes, the red velvet cake is on purpose. It's funny. :)

So, the bunny will be making another appearance this year. It'll be his first time at my dad's house. He was on hiatus last year. I have a few other treats under my belt this year so stay tuned!

And happy Easter!

Peeps!

Wednesday, April 20, 2011

I LOVE peeps! I love all the different peeps for all the different holidays... I love them soft or stale, in a s'more or in my hot cocoa. What I didn't know, is that I could also love peeps covered in chocolate! WHAT?! Chocolate covered peeps?! I think I might faint.

So, looking for cute and easy Easter dessert ideas I happened to google search "peeps" in images and came across chocolate covered peeps! Well of course I'm trying it. Period. I went to the store and bought some bunny peeps. Oh, it's on.


INGREDIENTS (simple)

Peeps
Melting chocolate
Sucker sticks

1. First I shoved a stick up the peep. Rude I know, but necessary.

2. Lay them out on a tray and freeze them so coating them in chocolate isn't too difficult. It keeps the peep stiff and not floppy. Trust me. My first peep was a bit floppy.


3. Take a few peeps on a stick out at a time and coat in chocolate.


-Oh no! I'm being devoured by rich dark chocolate!- 


 4. Let set on a tray with parchment paper or put in the fridge to harden the chocolate quickly.


So, I'm not sure if I'm done with these. I saw some with cute little faces but I really like them this simple. I'll think about it.

As for the rest of my night, I will be baking some very special cookies!

More to come later! It's been a busy last two weeks for me!

Chocolate Covered Chocolate Chip Cookie Dough

Thursday, April 14, 2011


That's a mouth full isn't it? Well, it's a mouth full of yummy actually! So, browsing my usual foodie sights I found a recipe at Willow Bird Baking, which is a great site to follow by the way, and had to try this recipe. 

Growing up I was always allowed to eat the dough. Bread dough, cookie dough, pie crust dough... I love dough... batter... raw baked goods! This may be gross to some (my BF) but even he loved these! And did I mention it's safe to eat?! No egg!! 


INGREDIENTS

1/2 cup softened butter
3/4 cup brown sugar
1 cup flour
1/2 teaspoon salt
1 tablespoon vanilla extract
1 cup mini semisweet chocolate chips
4-6 tablespoons water (I used just 4 tablespoons)

Melting chocolate


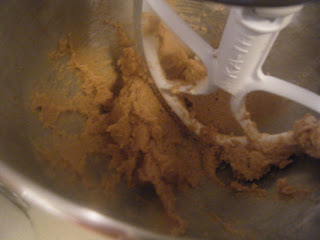
1. Cream the butter and sugar.

2. Add in the salt, vanilla and flour.

3. Mix in the chips by hand so they don't break up in your mixer.


4. Refrigerate over night. ( I always add this step when I'm covering something in melted chocolate. It helps the "ball" being coated keep its shape and not get stuck to my spoon when I dip it in the chocolate)


5. Roll into small balls. Keep cool in the fridge when working with multiple trays.


 6. Dip in melted chocolate of your choice. I used dark melting chocolate and sprinkled some fun multi colored sprinkles on top!


Theses were so cute that half the batch went in a large mason jar for my mom for her birthday! What an easy and super cute treat to add to a birthday gift!


The other half went on my cake stand with all the other chocolate dipped goodies I made that day!


The best part of this treat was how similar it tasted to an actual cookie dough and how "cookie doughy" it stayed on the inside of its chocolate shell! So creamy!

I've definitely got to try the safe to eat sugar cookie dough on that site now too!


Fresh Mozzarella Tomato and Basil Pasta

Sunday, April 3, 2011


I'm really wishing for warm weather here. Even the nicer days seem to end in rain, cold temps and frosty ground in the morning. So, to get the warm weather mojo going I thought I'm make a fresh summer pasta. 


INGREDIENTS

1 pound pasta
2 cups diced tomato
1 cup fresh mozzarella balls or cubed from a log
1/4 cup olive oil
1 tablespoon dried basil (if you have fresh that would be even better!)
Salt and Pepper


1. Mix tomato, mozzarella, oil and basil in a bowl. Toss and put in the fridge.


Doesn't that look good all by itself? I just need some toasted baguette and we've got bruschetta! 


2. Boil water and cook your pasta as directed. Drain and add to the mixture while still hot.

The warm noodles and cold dressing is an awesome combo!


Serve by itself or as a side. I think this is going to be my new go-to pasta salad this summer. So much better for you than pasta and veggies covered in mayo and italian dressing!

And if you have leftovers, just add a little olive oil if it dries out. I even nuked mine just to warm it a little!

YUM! Come on warm weather! I'm ready!!


Any Excuse to Eat! Copyright © 2009 Designed by Ipietoon Blogger Template for Bie Blogger Template Vector by DaPino